Strain Guides, Cannabis Education, Dispensary News & Deals, Lifestyle & Wellness
Vegan Weed Brownies: Plant-Based Cannabis Edibles Recipe
Vegan hash brownies deliver all the decadent, fudgy satisfaction of traditional cannabis brownies without any animal products—proving that plant-based edibles can match or exceed conventional recipes in taste, texture, and potency. Whether you follow a vegan lifestyle, have dairy or egg allergies, or simply want to explore more inclusive cannabis cooking, mastering this recipe opens doors to sharing edibles with friends regardless of dietary restrictions.
The secret to exceptional vegan cannabis brownies lies in understanding how plant-based ingredients replicate the moisture, binding, and richness that eggs and dairy traditionally provide. This comprehensive guide walks you through every step, from infusing vegan butter with cannabis to achieving that perfect gooey center, ensuring your plant-based edibles impress even the most devoted omnivores.
Why Choose Vegan Cannabis Edibles
Plant-based edibles offer advantages beyond dietary accommodation.
Inclusivity and Sharing
Dietary Diversity:
Modern cannabis consumption happens in diverse groups where dietary preferences vary widely. Vegan edibles accommodate:
- Vegans and vegetarians
- Lactose-intolerant individuals
- Egg allergy sufferers
- Those avoiding animal products for ethical reasons
- People seeking plant-based options
One Batch Serves All:
Rather than making multiple versions for different diets, vegan brownies work for everyone.
Social Ease:
No awkward conversations about who can eat what—everyone partakes equally.
Digestive Comfort
Easier Processing:
Many people digest plant-based foods more comfortably than dairy and eggs.
Reduced Heaviness:
Vegan brownies often feel lighter in the stomach while maintaining richness in flavor.
Edible Wait Time:
Since edibles take 45-90 minutes to kick in, comfortable digestion during that wait enhances the experience.
Environmental Considerations
Lower Impact:
Plant-based ingredients generally have smaller environmental footprints than animal products.
Sustainable Choice:
For environmentally conscious consumers, vegan edibles align values with consumption.
Shelf Stability
Longer Freshness:
Without dairy that spoils quickly, properly stored vegan brownies maintain quality longer.
Room Temperature Storage:
Can be kept at room temperature safely for longer periods than dairy-containing versions.
Taste and Texture Excellence
Just as Good:
Modern vegan baking techniques produce results indistinguishable from traditional recipes.
Rich and Fudgy:
Plant-based fats create the desired brownie texture perfectly.
No Compromise:
You’re not sacrificing quality by choosing vegan—you’re simply using different ingredients.
Essential Ingredients for Vegan Brownies
Quality ingredients create superior results.
Vegan Cannabutter
Primary Cannabis Component:
1/2 cup (115g) vegan cannabutter, melted
Making Your Own:
You’ll need to prepare cannabis-infused vegan butter before starting the brownie recipe. (Full instructions in next section)
Store-Bought Alternative:
Some dispensaries sell pre-made vegan cannabutter, though making your own ensures quality and potency control.
Substitute Options:
- Cannabis-infused coconut oil works identically
- Cannabis-infused vegan margarine
- Any plant-based fat infused with decarboxylated cannabis
Sweetener
Granulated Sugar:
1 1/2 cups (300g)
Why This Works:
Regular white sugar is vegan (despite some refining processes using bone char, most vegans consider it acceptable, or choose organic/raw sugar which doesn’t use this process).
Alternatives:
- Organic cane sugar (guaranteed no animal products in processing)
- Coconut sugar (darker, richer flavor)
- Mix of white and brown sugar (adds molasses notes)
Liquid Component
Non-Dairy Milk:
1/3 cup (80ml)
Best Options:
- Oat milk: Creamy, neutral flavor, bakes well
- Soy milk: Traditional choice, good protein content
- Almond milk: Light, slightly nutty
- Coconut milk: Rich, adds subtle tropical note
Unsweetened vs Sweetened:
Use unsweetened to control overall sweetness, though sweetened works if you adjust sugar accordingly.
Flavor Enhancer
Vanilla Extract:
2 teaspoons (10ml)
Quality Matters:
Pure vanilla extract provides better flavor than imitation.
Alcohol Content:
The small amount of alcohol in vanilla extract bakes off completely.
Dry Ingredients
All-Purpose Flour:
1 cup (150g)
Regular wheat flour works perfectly. Gluten-free alternatives available for additional dietary needs.
Cocoa Powder:
3/4 cup (90g)
Choose quality cocoa:
- Dutch-processed cocoa (darker, richer flavor)
- Natural cocoa powder (lighter, more traditional chocolate taste)
- Either works excellently
Baking Powder:
3/4 teaspoon (0.75g)
Provides slight lift and texture.
Salt:
1/2 teaspoon (0.50g)
Enhances chocolate flavor and balances sweetness.
Mix-Ins
Vegan Chocolate Chips:
1 cup (175g)
Verify Vegan Status:
Many chocolate chips contain milk—check ingredients. Brands like Enjoy Life and Lily’s offer vegan options.
Dairy-Free Varieties:
- Dark chocolate chips (70%+ cacao usually vegan)
- Semi-sweet vegan chips
- Cacao nibs for intense chocolate flavor
Making Vegan Cannabutter
Quality infusion determines edible potency.
Ingredients for Cannabutter
Vegan Butter:
1 cup (225g) vegan butter (makes enough for recipe plus extra)
Common Brands:
- Earth Balance
- Miyoko’s
- Country Crock Plant Butter
- Any plant-based butter substitute
Decarboxylated Cannabis:
7-14 grams (depending on desired potency)
Must be decarboxylated first (see Post 11 for full decarb instructions: 220°F for 30-40 minutes)
Water:
1 cup (240ml)
Infusion Process
Step 1: Combine in Saucepan
Add vegan butter and water to medium saucepan over low heat.
Why Water:
- Prevents burning
- Regulates temperature
- Separates and discards later
Step 2: Add Decarbed Cannabis
Once butter melts completely, add decarboxylated cannabis.
Step 3: Maintain Low Heat
Keep temperature at 160-180°F (70-82°C) for 2-3 hours.
Temperature Critical:
- Too hot: Degrades cannabinoids and burns butter
- Too cool: Incomplete extraction
- Use candy thermometer for accuracy
Never Boil:
Bubbling indicates too high temperature.
Step 4: Stir Occasionally
Stir every 20-30 minutes to ensure even infusion.
Step 5: Strain
After 2-3 hours, strain mixture through cheesecloth into heat-safe container.
Technique:
- Line container with several layers of cheesecloth
- Pour mixture through slowly
- Gather edges and gently squeeze to extract remaining butter
- Discard plant material
Step 6: Separate
Refrigerate strained liquid for several hours or overnight.
What Happens:
- Butter solidifies on top
- Water settles beneath
- Clear separation forms
Step 7: Remove Butter
Carefully lift solid butter layer off water. Discard water beneath.
Step 8: Store
Keep finished cannabutter refrigerated in airtight container for up to 2 weeks, or freeze for several months.
Equipment You’ll Need
Proper tools simplify the process.
Baking Equipment
8×8 Inch Baking Pan:
Standard square pan creates perfect brownie thickness.
Parchment Paper:
Essential for easy removal—brownies stick terribly without it.
Mixing Bowls:
- One large bowl (wet ingredients)
- One medium bowl (dry ingredients)
Whisk:
For combining ingredients smoothly.
Spatula:
Rubber or silicone for scraping and spreading.
Measuring Cups and Spoons:
Accurate measurements matter in baking.
Optional but Helpful
Electric Mixer:
Hand mixing works fine, but mixer ensures smooth consistency.
Cooling Rack:
Allows air circulation during cooling.
Sharp Knife:
For clean cuts once cooled.
Kitchen Scale:
More accurate than volume measurements (especially for flour and cocoa).
Step-by-Step Baking Instructions
Follow precisely for best results.
Preparation (10 minutes)
Step 1: Preheat Oven
Set to 350°F (175°C).
Why Full Preheat Matters:
Even temperature from start ensures proper baking.
Step 2: Prepare Pan
- Lightly coat pan bottom and sides with vegan butter
- Cut parchment to fit bottom with overhang on two sides (creates “handles” for removal)
- Press parchment into buttered pan
- Lightly butter parchment surface
Overhang Importance:
Makes lifting entire brownie block out of pan easy.
Mixing (8 minutes)
Step 3: Combine Wet Ingredients
In large bowl, whisk together:
- Melted vegan cannabutter
- Granulated sugar
Technique:
Whisk vigorously for 1-2 minutes until well combined and slightly lighter in color.
Step 4: Add Liquids
Add to butter-sugar mixture:
- Non-dairy milk
- Vanilla extract
Whisk until fully incorporated and smooth.
Step 5: Mix Dry Ingredients
In separate bowl, whisk together:
- Flour
- Cocoa powder
- Baking powder
- Salt
Whisk Thoroughly:
Breaking up cocoa lumps now prevents streaks in final batter.
Step 6: Combine Wet and Dry
Add dry mixture to wet ingredients.
Mixing Method:
- Stir with spatula just until combined
- Stop when you no longer see dry flour
- Don’t overmix (creates tough brownies)
Lumps Are Fine:
A few small lumps won’t hurt. Overmixing creates problems.
Step 7: Fold in Chocolate Chips
Gently fold vegan chocolate chips into batter until evenly distributed.
Reserve Some:
Save a small handful to sprinkle on top for visual appeal.
Baking (25 minutes)
Step 8: Transfer to Pan
Pour batter into prepared pan, spreading evenly with spatula.
Smooth Top:
Level surface ensures even baking.
Tap Out Air:
Gently tap pan on counter 2-3 times to release air bubbles.
Step 9: Bake
Place in preheated 350°F oven for 25 minutes.
Timing:
- Check at 23 minutes
- Brownies are done when edges look set but center still appears slightly soft
- Toothpick inserted in center should come out with a few moist crumbs (not wet batter)
Don’t Overbake:
These brownies have firm edges with gooey centers. Baking longer makes them dry and crumbly.
Cooling (Critical!)
Step 10: Initial Cooling
Remove from oven and place pan on cooling rack.
Let cool in pan for at least 30 minutes.
Step 11: Remove from Pan
Using parchment overhangs as handles, lift entire brownie block out of pan onto cooling rack.
Step 12: Complete Cooling
This is critical: Let cool completely (2+ hours minimum) before cutting.
Why This Matters:
- Hot brownies fall apart when cut
- Cooling firms structure
- Allows flavors to develop
- Creates clean cuts
Patience Pays:
Resist temptation to cut early.
Serving
Step 13: Cut into Portions
Transfer to cutting board.
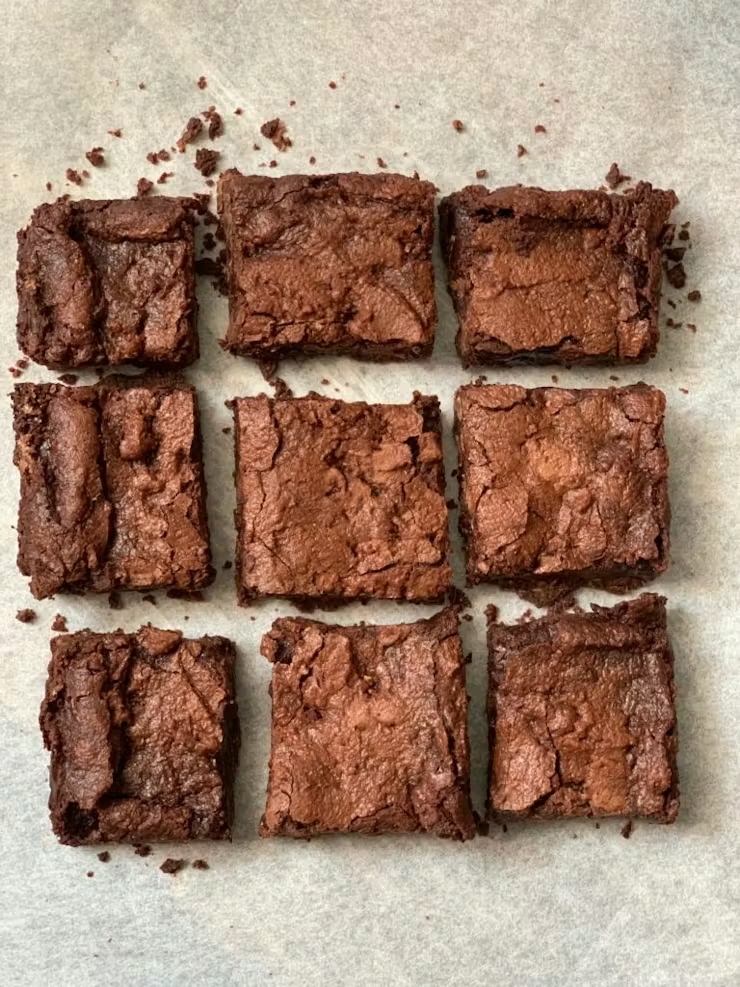
Using sharp knife, cut into 9 equal squares (3×3 grid).
Clean Cuts:
Wipe knife with damp cloth between each cut for cleanest edges.
Dosing Consideration:
9 pieces from 7-14g cannabis means each brownie contains approximately 0.78-1.56g cannabis worth of cannabinoids. Calculate expected THC based on your starting material’s potency.
Dosing and Potency Guidelines
Understanding strength prevents overconsumption.
Calculating THC Per Brownie
Formula:
(Total grams cannabis × THC% × 1000) ÷ number of brownies = mg THC per brownie
Example with 10g of 20% THC cannabis:
- Total THC: 10g × 0.20 = 2g = 2000mg THC
- Per brownie (9 total): 2000mg ÷ 9 = ~222mg per brownie
This is a VERY strong dose.
Adjusting Potency
For Moderate Dosing (10-15mg per brownie):
Use 0.5-0.75g cannabis total in cannabutter recipe, or cut brownies into smaller pieces (16-20 pieces instead of 9).
For Strong Dosing (25-50mg per brownie):
Use 1.5-3g cannabis in cannabutter, keep 9-piece cutting.
For Experienced Users (50mg+ per brownie):
Recipe as written with 7-10g cannabis works.
First-Time Recommendations
Start Very Small:
- Cut one brownie into quarters
- Eat one quarter (1/36 of total batch)
- Wait 90-120 minutes minimum
- Assess effects before consuming more
Why Such Caution:
Homemade edibles vary in potency, and THC from liver metabolism is significantly stronger than smoking.
Onset and Duration
Onset Time:
45-120 minutes (varies by metabolism, stomach contents, individual factors)
Peak Effects:
2-4 hours after consumption
Total Duration:
4-8 hours typically, potentially longer with high doses
Storage and Shelf Life
Proper storage maintains quality.
Short-Term (1 Week)
Room Temperature:
Store in airtight container at room temperature for up to 7 days.
Layer Separation:
Place parchment between layers if stacking.
Avoid Humidity:
Keep container in dry location.
Medium-Term (2-4 Weeks)
Refrigeration:
Store in airtight container in refrigerator for up to one month.
Texture Change:
Brownies firm up when cold but soften to room temperature in 20-30 minutes.
Long-Term (2-3 Months)
Freezing:
- Wrap individual brownies in plastic wrap
- Place in freezer-safe container or bag
- Freeze for up to 3 months
Thawing:
Leave at room temperature for 1-2 hours or microwave 15-20 seconds.
Potency Preservation
Cool and Dark:
Store away from heat and light which degrade cannabinoids.
Airtight:
Oxygen exposure decreases potency over time.
Label Clearly:
Mark containers with “cannabis” and date to prevent accidental consumption.
Troubleshooting Common Issues
Solutions to frequent problems.
Too Dry/Crumbly
Cause:
Overbaking or too much flour
Prevention:
- Remove from oven when center still looks slightly underdone
- Measure flour accurately (spoon into cup, level off)
- Don’t overbake trying to achieve firmness
Too Gooey/Undercooked
Cause:
Underbaking or oven temperature too low
Fix:
- Return to oven for 5 more minutes
- Verify oven temperature with thermometer
- Ensure full preheating
Dry Top but Gooey Middle
Cause:
Oven temperature too high
Prevention:
- Reduce temperature to 325°F and bake longer
- Use oven thermometer
- Place on middle rack
No Effects
Cause:
Cannabis not decarboxylated, or potency miscalculated
Prevention:
- Always decarb cannabis before infusing (220°F for 30-40 min)
- Calculate expected potency based on starting material
- Test cannabutter potency before making full batch
Harsh Taste
Cause:
Too much cannabis flavor in butter
Fix:
- Use higher quality starting material
- Strain cannabutter thoroughly
- Add more chocolate chips to mask flavor
- Use flavored vegan butter
Nutritional Information
Per brownie (1/9 of recipe):
Calories: 433
Total Fat: 17g
- Saturated Fat: 10.2g
- Unsaturated Fat: 6.8g
Cholesterol: 0mg
Sodium: 193mg
Total Carbohydrates: 68g
- Dietary Fiber: 3g
- Sugars: 37.2g
Protein: 4g
Note: Nutritional values don’t include THC/CBD content, which varies based on cannabis used.
Frequently Asked Questions
How do you make vegan hash brownies?
Make vegan hash brownies by first creating vegan cannabutter (infuse decarboxylated cannabis into plant-based butter with water for 2-3 hours at low heat, strain, refrigerate, and separate). Mix melted cannabutter with sugar, add non-dairy milk and vanilla, combine with flour, cocoa, baking powder and salt, fold in vegan chocolate chips, pour into parchment-lined 8×8 pan, and bake at 350°F for 25 minutes. Cool completely before cutting into 9 pieces. Use 7-14g cannabis depending on desired potency.
What’s the best non-dairy milk for vegan cannabis brownies?
The best non-dairy milk for vegan cannabis brownies is oat milk due to its creamy texture and neutral flavor that doesn’t interfere with chocolate taste. Soy milk also works excellently with good protein content. Almond milk works but is lighter, while coconut milk adds richness with subtle tropical notes. Choose unsweetened versions to control overall sweetness. All options produce excellent results—choose based on dietary preferences and flavor goals. Any 1/3 cup non-dairy milk substitutes equally in this recipe.
How potent are homemade vegan hash brownies?
Homemade vegan hash brownies potency depends entirely on cannabis amount and THC percentage. Using 10g of 20% THC cannabis creates ~2000mg total THC divided by 9 brownies = ~222mg per brownie (very strong). For moderate dosing (10-15mg per brownie), use 0.5-0.75g cannabis total or cut into 16-20 smaller pieces. For experienced users (50mg+ per brownie), use 7-10g cannabis. Calculate potency: (grams cannabis × THC% × 1000) ÷ number of pieces = mg per serving.
Can you make vegan cannabutter ahead of time?
Yes, make vegan cannabutter ahead and store refrigerated in airtight container for up to 2 weeks, or frozen for several months. This allows batch preparation and quality testing before making brownies. Prepare cannabutter by infusing decarboxylated cannabis in vegan butter and water at low heat for 2-3 hours, strain, refrigerate to separate, and store. Having pre-made cannabutter simplifies the brownie-making process to just mixing and baking. Thaw frozen cannabutter overnight in refrigerator before using.
How long do vegan weed brownies take to kick in?
Vegan weed brownies take 45-120 minutes to kick in depending on metabolism, stomach contents, and individual biochemistry. Effects peak 2-4 hours after consumption and last 4-8+ hours total. Start with small portions (1/4 brownie or less for first-timers), wait minimum 90 minutes before consuming more. Eating on an empty stomach speeds onset but increases intensity; consuming with food slows onset but creates smoother experience. Edibles produce stronger, longer-lasting effects than smoking the same amount of THC.
How should you store vegan cannabis brownies?
Store vegan cannabis brownies in airtight containers at room temperature for up to 7 days, refrigerated for up to one month, or frozen for 2-3 months. Place parchment between layers if stacking. For freezing, wrap individual brownies in plastic wrap before placing in freezer-safe containers. Store away from heat and light to preserve potency. Label containers clearly with “cannabis” and date. Refrigerated brownies firm up but soften at room temperature in 20-30 minutes. Vegan brownies often stay fresh longer than dairy versions.